Solar Powered Shed or Workshop Setup 2026: A Comprehensive Guide
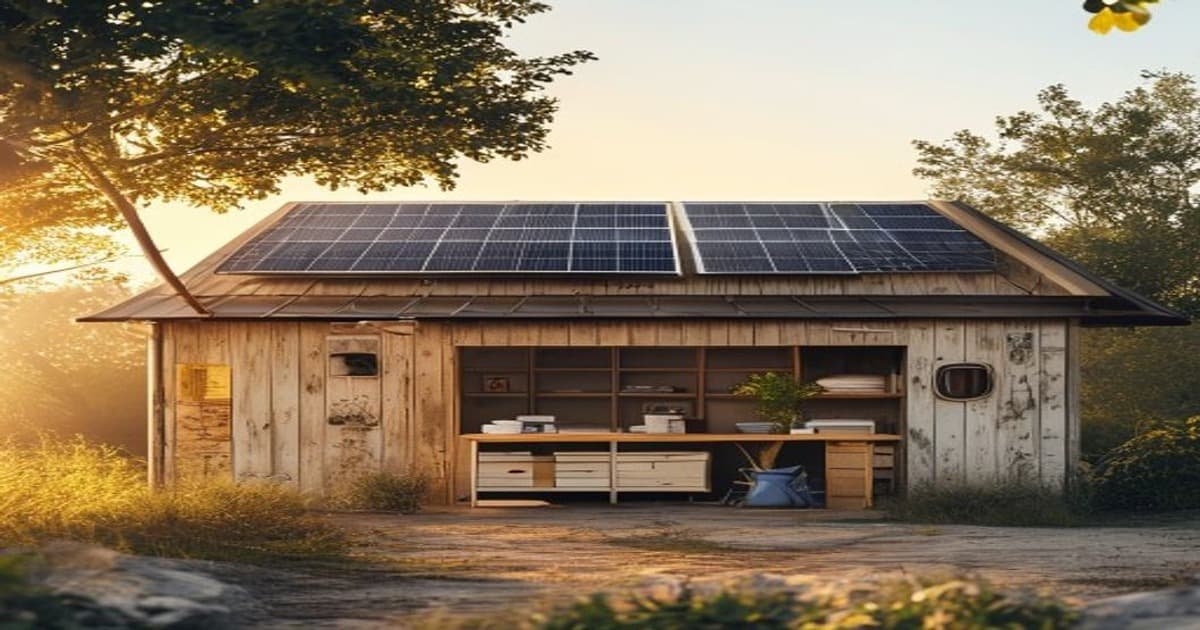
Learn the essential steps to create a solar powered shed or workshop setup in 2026, from selecting the right panels and batteries to installing inverters and maximizing efficiency. This guide covers everything you need for a reliable off-grid workspace.
Solar Powered Shed or Workshop Setup 2026: A Comprehensive Guide
If you’re dreaming of a quiet backyard retreat where you can work on projects, store tools, or charge an electric vehicle without relying on the grid, a solar powered shed or workshop setup 2026 is the perfect solution. Advances in photovoltaic technology, lithium batteries, and smart inverters have made it easier than ever to generate and store clean energy right where you need it. This guide walks you through every stage—from picking the best solar panels to wiring a safe, efficient system—so you can enjoy year‑round power for lighting, tools, and even a small EV charger.
Introduction to Solar Powered Shed or Workshop Setup 2026
A solar powered shed or workshop setup 2026 begins with a solid structure—whether you purchase a pre‑fabricated Tuff Shed, convert an existing garden shed, or build a custom workshop from scratch. The goal is to create a weather‑proof envelope that can support solar panels on the roof or a ground‑mount array nearby. Once the structure is ready, you’ll need a few core components: solar panels to capture sunlight, a charge controller to regulate the flow, batteries to store energy, and an inverter to convert DC power to AC for your tools and appliances.
Many DIYers start with a Complete Off-Grid Solar Kits on Amazon that includes panels, a controller, and basic wiring. Pairing that kit with a reliable source of panels such as Amazon Solar Products gives you flexibility to expand later. Whether you plan to run a few LED lights and a power drill or run a table saw, air compressor, and a Lectron EV charger, the fundamentals remain the same: size the system to your daily watt‑hour needs, then add a 20‑30 % buffer for cloudy days and future growth.
Choosing the Right Solar Panels for Your Shed or Workshop
Selecting the appropriate solar panels is the first technical decision in your solar powered shed or workshop setup 2026. Panel efficiency, size, and mounting options all affect how much energy you can harvest from a limited roof area. For most small structures, monocrystalline panels offer the best power‑per‑square‑foot ratio, while polycrystalline options can save money if space isn’t tight.
Consider these panel options when designing your array:
- Monocrystalline Solar Panels on Amazon – high efficiency, sleek black look.
- 500W Solar Panels on Amazon – ideal for maximizing output on limited roof space.
- 400W Solar Panels on Amazon – a solid mid‑range choice for mixed lighting and tool loads.
- 350W Solar Panels on Amazon – works well when you need several panels to fit a small roof.
- 500W Polycrystalline Solar Panels on Amazon – budget‑friendly if you have ample mounting area.
- SunPower Solar Panels on Amazon – industry‑leading efficiency for premium builds.
- Renogy Solar Panels on Amazon – popular among DIY enthusiasts for reliable performance.
- Victron Solar Products on Amazon – known for robust construction and excellent warranty.
- Off-Grid Solar Panels on Amazon – specifically designed for remote, off‑grid applications.
- Solar Roof Panels on Amazon – integrated roofing solution that doubles as weatherproofing.
- Solar Roof Panels on Amazon – alternative style with different aesthetic and mounting hardware.
- Nature's Generator Solar Systems – portable solar generators that can supplement a fixed array.
- ALLPOWERS Solar Products – versatile panels suitable for both roof‑mount and ground‑mount kits.
- Eco-Worthy Solar Products – affordable entry‑level panels for beginners.
When calculating your array size, add up the wattage of all devices you intend to run simultaneously. For example, a 1,000 W table saw plus a 600 W air compressor and 200 W of lighting totals roughly 1,800 W. To run those loads for four hours you’d need about 7,200 Wh of usable storage. A 5‑panel array of 400W modules (2,000W peak) producing 5 sun‑hours per day yields roughly 10,000Wh—more than enough to cover daily use and recharge the batteries.
Installing a Solar Powered Electrical System in Your Shed or Workshop
Once you have your panels selected, the next stage in your solar powered shed or workshop setup 2026 is installing the balance‑of‑system (BOS) components. Proper wiring, over‑current protection, and ventilation are critical for safety and longevity. If you’re not comfortable working with AC mains, consider hiring a licensed electrician for the inverter‑to‑panel connection, while you handle the DC side.
Key components to purchase:
- Solar Inverters on Amazon – converts DC battery power to AC for standard tools.
- MPPT Solar Charge Controllers on Amazon – maximizes harvest from your panels, especially in varying light.
- Goal Zero Power Stations on Amazon – all‑in‑one battery/inverter units for plug‑and‑play simplicity.
- EcoFlow Power Stations on Amazon – high‑capacity stations with fast AC charging and multiple outlets.
- Jackery Power Stations on Amazon – reliable portable power for lighter workshop loads.
- EcoFlow Delta Pro on Amazon – 3,600Wh expandable system perfect for heavy‑duty tools.
- BLUETTI Portable Power Stations – robust LiFePO4 batteries with pure‑sine wave inverters.
- FOSSiBOT Portable Power Stations – rugged option with high surge capacity for motors.
- Solar Generators on Amazon – versatile generators that can be recharged via solar or AC.
- Jackery Solar Generators – solar‑compatible generators with built‑in MPPT controllers.
- Enphase Home Energy on Amazon – microinverter system that optimizes each panel individually.
- SolarEdge Home Battery on Amazon – DC‑coupled battery that integrates with SolarEdge inverters.
- SolarEdge Home Battery on Amazon – alternative configuration for expanded storage.
Begin by mounting the panels securely using roof flashing or a ground‑mount rack. Run UV‑rated PV wire from the array to a weatherproof junction box near the battery bank. From there, connect the positive and negative leads to the MPPT charge controller, which should be mounted inside the shed where temperatures stay moderate. The controller’s output runs to the battery bank—whether you choose a DIY lithium build using LiTime Lithium Batteries and Power Queen LiFePO4 Batteries or a pre‑built unit like the Solar Battery Storage on Amazon.
Next, wire the battery bank to the inverter. Use appropriately sized cables (typically 4‑AWG for systems up to 3,000W) and install a DC disconnect switch for safety. The inverter’s AC output can then feed a sub‑panel with circuit breakers for your outlets, lighting, and any dedicated EV charger circuit. If you plan to add a Lectron EV charger, run a dedicated 240 V circuit from the inverter to the charger location, ensuring you have a GFCI breaker for protection.
Tips and Tricks for Maximizing Efficiency in Your Solar Powered Shed or Workshop
To get the most out of your solar powered shed or workshop setup 2026, consider these practical tips:
-
Optimize Panel Orientation – In the northern hemisphere, face panels true south at an angle equal to your latitude plus 15° for winter performance. Use a solar pathfinder app to verify shading throughout the day.
-
Use Energy‑Efficient Tools – Choose brushless DC motors and LED lighting to reduce the draw on your battery bank. A 18 V brushless impact driver, for instance, consumes far less power than its brushed counterpart.
-
Implement Load Management – Stagger high‑wattage tools; run the table saw first, then the compressor, to avoid surging the inverter. Many modern inverters have a “power‑saving” mode that reduces idle consumption.
-
Monitor Your System – Install a Bluetooth‑enabled battery monitor (often included with LiTime Lithium Batteries or Redodo Power) to track state‑of‑charge, voltage, and power usage in real time via a smartphone app.
-
Add Redundancy – Keep a small Portable Solar Generators on Amazon or a Solar Battery Storage on Amazon as a backup for cloudy weeks. These units can be recharged via the main array or a wall outlet when grid power is available.
-
Consider EV Charging – If you own an electric vehicle or e‑bike, a dedicated Level 2 charger like the Lectron EV Chargers can be added to your shed. Program the charger to draw power only when batteries are above 80 % to preserve autonomy.
-
Maintain Battery Health – LiFePO4 batteries last longer when kept between 20 % and 80 % charge for daily cycling. Use a low‑voltage disconnect to prevent over‑discharge, and store spares at 50 % charge in a cool, dry place.
-
Expand Gradually – Start with a modest 800W panel array and a 2 kWh battery bank. As you add tools or an EV charger, scale up by adding more panels (500W Solar Panels on Amazon or 400W Solar Panels on Amazon) and stacking additional batteries (Solar Battery Storage on Amazon or Power Queen LiFePO4 Batteries).
-
Leverage Smart Accessories – Products like the Eco-Worthy Solar Products line include affordable solar‑powered security lights and motion sensors that enhance workshop safety without adding load.
-
Plan for Future Tech – Keep conduit runs and extra breaker slots open for upcoming innovations such as bidirectional vehicle‑to‑home (V2H) chargers or home energy management systems.
By following these guidelines, your shed will remain a productive, low‑cost workspace that pays for itself in reduced electricity bills and increased self‑reliance.
Conclusion
Building a solar powered shed or workshop setup 2026 is an achievable project that blends practical DIY skills with cutting‑edge renewable technology. Begin with a solid structure, choose high‑efficiency panels like Monocrystalline Solar Panels on Amazon or SunPower Solar Panels on Amazon, pair them with a reliable MPPT controller and a robust battery bank—whether you assemble one from LiTime Lithium Batteries and Power Queen LiFePO4 Batteries or opt for a turnkey solution such as the Goal Zero Power Stations on Amazon or EcoFlow Power Stations on Amazon. Protect your investment with proper wiring, fuses, and ventilation, and then enjoy the freedom of running tools, lights, and even an Lectron EV Charger completely off the grid.
Remember to size your system for your actual load, add a 20‑30 % buffer for inefficiencies, and maintain your batteries with regular monitoring. With the components and tips outlined above—ranging from the versatile ALLPOWERS Solar Products to the rugged FOSSiBOT Portable Power Stations—you can create a workshop that not only meets today’s power needs but is ready to expand as your projects grow. Embrace the sun, cut the cord, and turn your shed into a self‑sufficient haven of creativity and productivity in 2026 and beyond.
If you're serious about protecting your links, your data, and your brand, it's time to stop sharing raw URLs.
Start using Bilt.ly.
Get started free →